从ecCodes的GRIB2消息构建xarray对象
之前的文章《GRIB笔记:使用cfgrib加载GRIB文件》中介绍使用 cfgrib 将 GRIB 消息加载为xarray.DataArray。
经过最近一段时间的几次测试,发现 cfgrib 从 GRAPES GFS 的原始分辨率 GRIB 文件中检索并加载单个要素场需要4-5秒左右,远远超过直接使用 eccodes-python 的时间。 初步使用Dask并行加载要素场时,感觉加载时间被进一步延长,严重制约数据计算的速度。
我还没有仔细研究 cfgrib 的源码,不知道是我使用方法不正确,还是 cfgrib 本身速度比较慢。
不过,有一种折中的方案,使用 eccodes-python 查找并加载 GRIB 2 要素场,将其仿照 cfgrib 包装成 xarray.DataArray 对象。
本文介绍一种简单的封装方法。
查找要素场
GRAPES GFS 的原始分辨率 GRIB 2 数据每个文件只包含一个时次的一个时效,所以查找要素场只需要指定要素名、层次类型和层次。
如果要素场有 shortName,则只需要从 GRIB 2 消息中读取 shortName, typeOfLevel 和 level 并比较与给定的筛选条件是否相等。
如果要素场没有 shortName,则可以通过 discipline, parameterCategory 和 parameterNumber 确定要素,再比较 typeOfLevel 和 level 即可。
具体代码请访问 nwpc-oper/nwpc-data 项目。
构建二维数组
查找到要素场后,返回的是 GRIB 2 消息的 handler。 使用 eccodes-python 的 API 可以从 handler 中获取 GRIB 2 消息的数据段和属性。
下面的代码获取 GRIB 2 消息中的数据段,返回一维数组。
values = eccodes.codes_get_double_array(message, "values")
想要构建二维网格,还需要获取数据的描述信息,包括经纬度起止范围,分辨率,格点数等。
latitudeOfFirstGridPointInDegrees = eccodes.codes_get(message, "latitudeOfFirstGridPointInDegrees")
longitudeOfFirstGridPointInDegrees = eccodes.codes_get(message, "longitudeOfFirstGridPointInDegrees")
latitudeOfLastGridPointInDegrees = eccodes.codes_get(message, "latitudeOfLastGridPointInDegrees")
longitudeOfLastGridPointInDegrees = eccodes.codes_get(message, "longitudeOfLastGridPointInDegrees")
iDirectionIncrementInDegrees = eccodes.codes_get(message, "iDirectionIncrementInDegrees")
jDirectionIncrementInDegrees = eccodes.codes_get(message, "jDirectionIncrementInDegrees")
ni = eccodes.codes_get(message, "Ni")
nj = eccodes.codes_get(message, "Nj")
使用 reshape 函数将一维数组转换为二维数组。
values = values.reshape(nj, ni)
为了向 xarray.DataArray 中添加维度信息,创建经纬度坐标数组。
lons = np.linspace(longitudeOfFirstGridPointInDegrees, longitudeOfLastGridPointInDegrees, ni, endpoint=True)
lats = np.linspace(latitudeOfFirstGridPointInDegrees, latitudeOfLastGridPointInDegrees, nj, endpoint=True)
下面就可以构建一个简单的带经纬度坐标的 xarray.DataArray 数据。
data = xr.DataArray(
    values,
    dims=("latitude", "longitude"),
    coords={
        "latitude": lats,
        "longitude": lons,
    }
)
打印 data 对象显示如下:
<xarray.DataArray (latitude: 720, longitude: 1440)>
array([[249.19234375, 249.16234375, 249.16234375, ..., 249.15234375,
        249.19234375, 249.14234375],
       [249.45234375, 249.45234375, 249.42234375, ..., 249.45234375,
        249.44234375, 249.44234375],
       [249.69234375, 249.68234375, 249.68234375, ..., 249.70234375,
        249.67234375, 249.68234375],
       ...,
       [235.33234375, 235.45234375, 235.62234375, ..., 235.47234375,
        235.63234375, 235.48234375],
       [235.78234375, 235.91234375, 235.64234375, ..., 235.80234375,
        235.72234375, 235.82234375],
       [235.66234375, 235.86234375, 235.82234375, ..., 235.85234375,
        235.68234375, 235.70234375]])
Coordinates:
  * latitude   (latitude) float64 89.88 89.62 89.38 ... -89.38 -89.62 -89.88
  * longitude  (longitude) float64 0.0 0.25 0.5 0.75 ... 359.0 359.2 359.5 359.8
可以看到经纬度信息已包含在二维数据内。
使用该数据绘制一个简单的填充图。
data.plot.contourf(size=10, aspect=2, cmap="coolwarm", levels=20)
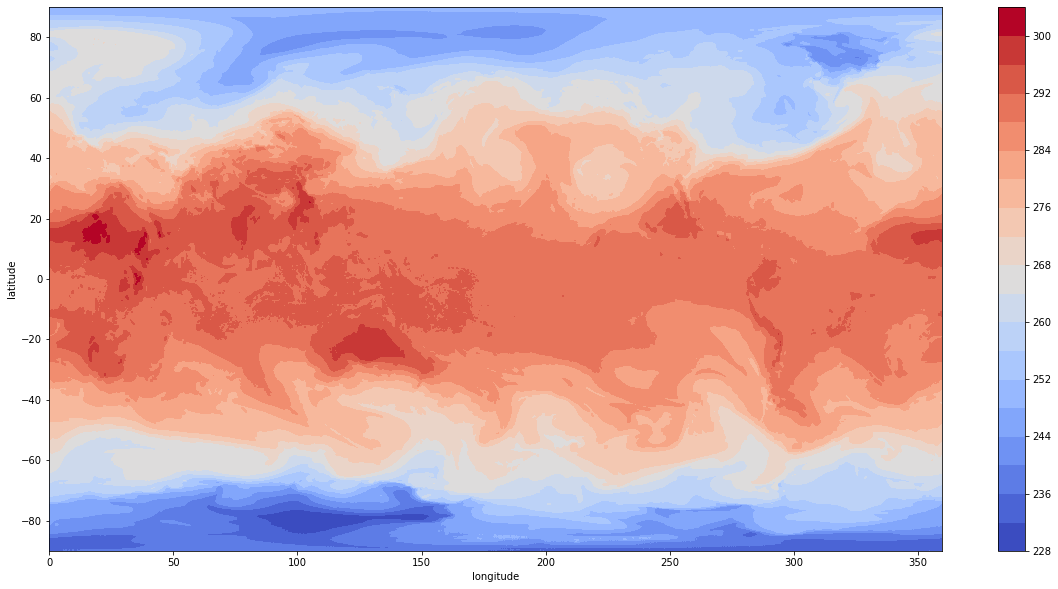
填充图示例
添加属性
cfgrib生成的对象中包含 GRIB 的属性信息。本节仿照 cfgrib 的实现方式,介绍向 DataArray 中添加属性的方法。
根据属性名称列表,获取属性值。
因为列表中的某些 GRIB Key 可能只出现在部分 GRIB 消息中,所以使用异常捕获语句将缺失的属性值设置为 undef。
attr_keys = [
    'edition',
    'centre',
    'subCentre',
    'tablesVersion',
    "localTablesVersion",
    'dataType',
    'dataDate',
    'dataTime',
    'step',
    'stepType',
    'stepUnits',
    'stepRange',
    "name",
    "shortName",
    'cfName',
    'discipline',
    'parameterCategory',
    'parameterNumber',
    'shortName',
    'gridType',
    'gridDefinitionDescription',
    'typeOfFirstFixedSurface',
    'typeOfLevel',
    'level',
    'numberOfPoints',
    "missingValue",
    'units',
]

grid_keys = [
    'latitudeOfFirstGridPointInDegrees',
    'longitudeOfFirstGridPointInDegrees',
    'latitudeOfLastGridPointInDegrees',
    'longitudeOfLastGridPointInDegrees',
    'iDirectionIncrementInDegrees',
    'jDirectionIncrementInDegrees',
    'Ni',
    'Nj',
]

all_keys = attr_keys + grid_keys

all_attrs = {}
for key in all_keys:
    try:
        value = eccodes.codes_get(message, key)
    except:
        value = "undef"
    all_attrs[key] = value
考虑到部分 GRIB Key,例如 shortName,可能会因为没有对应的值而返回 unknown,
在设置属性时将 unknown 和 undef 都过滤掉。
data_attrs = {f"GRIB_{key}": all_attrs[key] for key in attr_keys if all_attrs[key] not in ("undef", "unknown") }
data.attrs = data_attrs
这样,最终的 data 中就包含以 GRIB_ 开头的一些列属性值。
后续开发
目前仅实现了最基本的功能,只在 GRAPES GFS 的 GRIB 2 数据中测试过,与 cfgrib 还有巨大的差距。 cfgrib 包括对各种投影方式,数据保存方式的支持,以及其他大量的属性适配。 后续计划逐步参照 cfgrib 的实现方式,结合实际的需求,增加更丰富的功能。
如果对 GRIB 2 消息加载耗时不敏感,建议直接使用功能强大的 cfgrib 库。